
Recent changes:
| November 2023: | Minor cleanup to address GCC warnings on legacy lib3ds code. |
| August 2020: | Ported to a ZX Spectrum 48K (Hackaday-ed). |
| August 2017: | Ported to an ATmega328p with an OLED screen (Hackaday-ed). |
| April 2012: | Cleaned up triangle setup code via X-Macros |
| August 2011: | Added Intel's Morphological Anti-aliasing (MLAA) |
| January 2011: | Added raytracing mode: reflections, refractions, shadows, ambient occlusion and anti-aliasing. |
| December 2010: | CUDA "port" of raycaster mode posted to Reddit |
| July 2010: | Javascript "port" of points-only mode posted to Reddit |
| May 2010: | Added to the Phoronix Test Suite |
| April 2010: | Reddit-ed! |
Downloads
Click here to get portable GPL source code and Windows binaries.Benchmarking results from 100s of systems
Benchmarking results from the renderer's execution on 100s of systems (Phoronix).Introduction
One of my hobbies that has persisted over the years is my real-time pure-software 3D renderer. I began writing it in the days of Hercules and CGA cards... and will probably be playing with the code for as long as I live :‑)My priorities, ever since I started doing this, are simple: try to make the code as clear and concise as possible, while using good algorithms to improve the rendering speed. In plain words, my primary care is the clarity of the code - as well as the renderer's speed.

Generated in the renderer's raytracing mode, with reflections and refractions enabled.
Conciseness and clarity are mostly accomplished via C++ templates, that unify the incremental calculations for the rasterizers and the ray intersections for the raytracers. And as for speed, we are now firmly in the age of multi-core CPUs - so software rasterizing can (finally) do per-pixel lighting and soft-shadows in real-time, while raytracing can generate beautiful images in a matter of seconds.

version runs at 60 frames/sec.
The raytraced version: 3 sec/frame ;‑)
Features
This is a (more or less) clean implementation of the basic algorithms in polygon-based 3D graphics. The code includes...
- 3D transformations (from world coordinates, to camera-space/light-space coordinates)
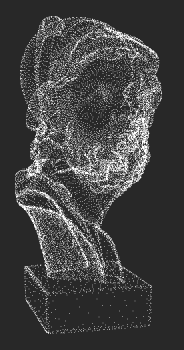
- Point rendering (vertex-based or triangle-based)
- Anti-aliased lines rendering
- Gouraud shading (complete Phong equation calculated per vertex)
- Phong shading (complete Phong equation calculated per pixel)
- Z-Buffer hidden surface removal
- Shadow mapping
- Soft shadow mapping
- Raytracing, with shadows, reflections, refractions, ambient occlusion and anti-aliasing
- Portable display and keyboard handling through libSDL
The supported 3D formats are:
- .3ds, i.e. the well known 3D Studio format (via lib3ds)
- .tri, a simple binary dump of vertex and triangle data
- .ply (only the ASCII kind, as saved from MeshLab and shadevis)
Implementation wise, the code...
- Is orchestrated via autoconf/automake, so it will compile and run cleanly on most platforms (tested so far on Linux/x86, Mac OS/X, Windows (using TDM/MinGW gcc), OpenSolaris (GCC/TBB), OpenBSD/amd64 and FreeBSD/amd64)
- Includes a separate VisualC directory for Windows/MSVC users, with all dependencies pre-packaged for easy compilation
- Can be configured to use OpenMP, provided that your compiler's support for OpenMP is mature enough (e.g. GCC since version 4.3.2)
- Can be configured to use Intel Threading Building Blocks, thus taking advantage of multi-core CPUs and executing faster
- Uses C++ template-based metaprogramming, in order to move as much rendering logic as possible from run-time to compile-time.
This is a software-only renderer, so don't expect hardware class (OpenGL) speeds. Then again, speed is a relative thing: the train object (available inside the source package, in the "3D-Objects" folder) was rendered (in soft-shadows mode) at a meager 6fps on an Athlon XP, back in 2003. Around 2005, however, a Pentium4 desktop at work took this up to 11 fps. As of 2007, by way of Intel's Threading Building Blocks (or OpenMP) the code uses both cores of a Core2Duo to run at 23fps... And since it uses TBB/OpenMP, it will automatically make use of any additional cores... so give the CPUs a few more years... :‑)
Update, November 2009: On a 4-core AMD Phenom at 3.2GHz, the
train now spins at 80 frames per second... Give me more cores! :‑)
Update, September 2017: On a 16-core Intel Core i9 7960X...
718 frames per second!
Update, June 2018: Phoronix shows the evolution of my renderer's
speed across 28 CPUs...
Update, November 2020: 1000 frames-per-second barrier broken,
by Ryzen 9 5950X...
The code also runs 20-25% faster if compiled under 64-bit environments.
Screenshots
Skipping points rendering, lets begin with an anti-aliased rendering of a train:
Notice the anti-aliasing in the zoomed section

Shadow mapping - self shadowing

Gotta find time to hook this up with gnuchess! :‑)


Which brings us to the matter of speed, again: The program allows changing the rendering mode at runtime, and therefore offers interactive control of the balance between rendering speed and rendering quality:
 |
 |
 |
 |
| Points | Ambient occlusion | Per-pixel Phong | Shadow maps |

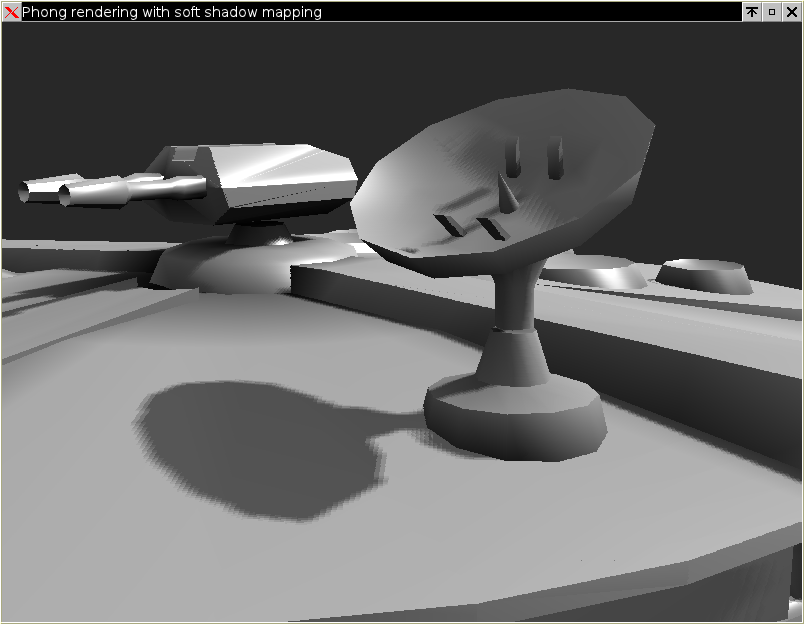
Shadow mapping and soft shadows
Shadow mapping offers a good balance between rendering quality and rendering speed. Shadow maps are "special pictures" rendered along the normal rendering pipeline, but from the point of view of the light source. They provide the "light-height" information that tells the rasterizer when the pixel drawn is in shadow and when not. In case you were wondering, here is what a shadow map looks like (67KB image).Normally, shadow maps generate sharp, "pixelated" shadow edges, because of the sampling of the shadow map. To improve this, instead of sampling only one "shadow pixel", the renderer can also use a weighted average of its neighbours, and thus provide nice looking soft-shadows in real-time:

Self-shadowing at its finest...


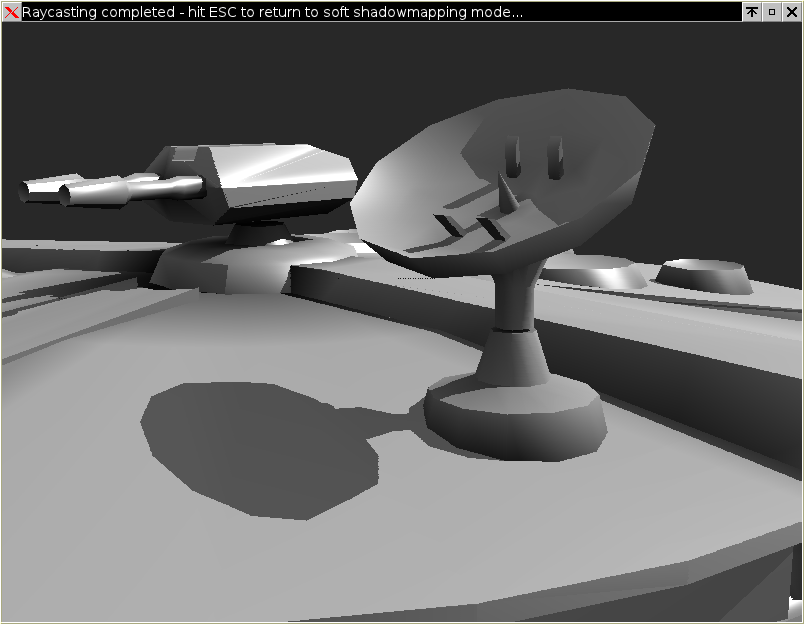
Two weeks later, I removed this mode in favour of a full raytracer - it was slower than the rasterizer modes anyway, and a full raytracer offers far better quality. It still exists in the CUDA port, if you are interested.
Ambient Occlusion
The renderer uses ambient occlusion to significantly improve the rendering quality of indirectly lit areas.For the rasterizers, it linearly interpolates (per-pixel) the ambient occlusion coefficient, which must be pre-calculated per vertex and stored in the model (see below, "Creating more 3D objects on your own").
For the raytracer, by uncommenting the #define AMBIENT_OCCLUSION, you will enable a stochastic ambient occlusion calculation for each raytraced pixel: When a triangle is intersected by a primary ray, AMBIENT_SAMPLES rays will be spawned from the intersection point, and they will be used to calculate the ratio of ambient light at that point.
The difference is very clear:

Here's an ambient-occlusion raytracing of Sponza (with 32 ambient rays cast per pixel):


Download, compile and run
If your CPU uses hyper-threading and/or has *many* cores, performance as you increase threads may go down instead of going up. You can control the number of threads used during rendering via the OMP_NUM_THREADS environment variable; and you may well have to, to avoid your performance going down because of memory bandwidth saturation.
As an example from both sides of the spectrum, on an Atom 330 (2 real cores, each one appearing as two "virtual"), the "virtual" cores help a lot: running with four threads, the raytracer is 1.3x faster than running with two. But on an dual-CPU, Intel Xeon W5580 (total of 8 real cores, appearing as 16 "virtual"), the speed increases almost linearly as we increase threads, until we reach 8 - and then the speed nose-dives, with the 16 thread version being 63 times slower (!).
So make sure you check the runtime performance of the renderer by exercising direct control over the number of threads (via OMP_NUM_THREADS).
For Windows/MSVC users:
Just open the project solution (under VisualC/) and compile for Release mode. It is configured by default to use Intel TBB for multithreading, since Microsoft decided to omit OpenMP support from the free version of its compiler (the Visual C++ Express Edition). All dependencies (include files and libraries for SDL and TBB) are pre-packaged under VisualC/, so compilation is as easy as it can get.
When the binary is built, right-click on "Renderer-2.x" in the Solution explorer, and select "Properties". Click on "Configuration Properties/Debugging", and enter ..\..\3D-Objects\chessboard.tri inside the "Command Arguments" text box. Click on OK, hit Ctrl-F5, and you should be seeing the chessboard spinning. Use the controls described below to fly around the object.
The default compilation options are set for maximum optimization, using SSE2 instructions.
If you have the commercial version of the compiler (which supports OpenMP) you can switch from TBB to OpenMP:
|
For everybody else (Linux, BSDs, Mac OS/X, etc)
Compilation follows the well known procedure...
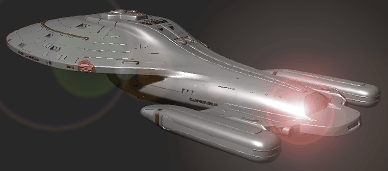
Voyager (yep, I Gimp-ed the lens flare :‑)
  bash$ ./configure
  bash$ make
The source package includes a copy of the sources for lib3ds 1.3.0, and the build process will automatically build lib3ds first.
SSE, SSE2 and SSSE3 x86 SIMD optimizations will be detected by configure, but if you have a non-Intel CPU, pass your own CXXFLAGS flags, e.g.
  bash$ CXXFLAGS="-maltivec" ./configure
  bash$ make
Compiling under 64-bit environments (e.g. AMD64 or Intel EM64T) is further improving speed; compiled with the same options, the code runs 25% faster under my 64-bit Debian.
| A note for Mac OS/X and FreeBSD developers: The default FreeBSD and Mac OS/X environments (XCode) include an old version of GCC (4.2.x). This version is known to have issues with OpenMP, so if you do use it, your only available option with multicore machines is Intel TBB (which works fine). You can, however, download the latest GCC from ports, if you use FreeBSD, or from High Performance Computing for Mac OS/X - they both offer the latest GCC series. Results are much better this way: OpenMP works fine, and support for the SSE-based -mrecip option boosts the speed by more than 30%. |

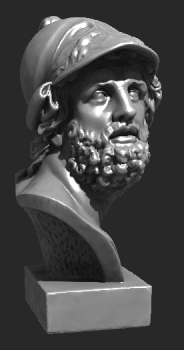
Some of the Parthenon's art (Elgin marbles)...
  bash$ cd 3D-Objects
  bash$ ../src/renderer/renderer chessboard.tri
- Hit 'R' to stop/start auto-spin.
- Use the cursor keys, 'A' and 'Z' to pilot.
- Rotate the light with 'W', 'Q'.
- 'S' and 'F' are 'strafe' left/right, 'E' and 'D' are 'strafe' up/down.
(strafe keys don't work in auto-spin mode). - The '1' to '0' keys as well as the PageUp/PageDown change the rendering mode, cycling through:
- Points
- Points via triangle culling
- Anti-aliased lines
- Ambient (when ambient occlusion data are available in the 3D model, this actually looks good)
- Gouraud (complete Phong lighting per vertex)
- Phong (complete Phong lighting per pixel)
- Phong and shadow maps
- Phong and soft shadow maps
- Raytracing, with shadows and reflections
- Raytracing, with shadows, reflections and anti-aliasing
- ESC quits.
Command line parameters
Usage: renderer [OPTIONS] [FILENAME]

  -h         this help
  -r         print FPS reports to stdout (every 5 seconds)
  -b         benchmark rendering of N frames (default: 100)
  -n N       set number of benchmarking frames
  -w         use two lights
  -m <mode>  rendering mode:
       1 : point mode
       2 : points based on triangles (culling,color)
       3 : triangles, wireframe anti-aliased
       4 : triangles, ambient colors
       5 : triangles, Gouraud shading, ZBuffer
       6 : triangles, per-pixel Phong, ZBuffer
       7 : triangles, per-pixel Phong, ZBuffer, Shadowmaps
       8 : triangles, per-pixel Phong, ZBuffer, Soft shadowmaps
       9 : triangles, per-pixel Phong, ZBuffer, raycasted shadows
       0 : raytracing, with shadows, reflections and anti-aliasing
Creating more 3D objects on your own
The rasterizer output is looking much better if the model carries pre-calculated ambient occlusion information per vertex. To do this:- Use MeshLab to convert your 3D object to .PLY.
- Load it up in shadevis and hit ENTER to have shadevis calculate the ambient occlusion factors per vertex. After that, hit 'D' as many times as necessary to lower the diffuse light to 0%, and hit 'a' to pump up the ambient to 100%. Hit 'S' to save the object.
- Load the saved '..._vis.ply' with my renderer.

The dark side... of coding SMP
Well... I've always loved coding real-time 3D graphics. Experimenting with new algorithms, trying to make things run faster, look better... And as a side effect, I became a better coder :‑)
Anyway, these sources are my "reference" implementations. At some point around 2003, I decided that it was time to clean up the code that I've been hacking on over the years and focus on code clarity - ignoring execution speed. To that end, floating point is used almost everywhere (fixed-point begone!) and this being Phong shading, the complete lighting equation is calculated per pixel. I basically created a "clean" implementation of everything I have ever learned about polygon-related graphics. The clarity of the code also paved the way for the OpenGL and CUDA versions...
Rant 2: Tales of Multicore
This code was single threaded until late 2007. At that point, I heard about OpenMP, and decided to try it out. I was amazed at how easy it was to make the code "OpenMP-aware": I simply added a couple of pragmas in the for-loops that drew the triangles and the shadow buffers, and ...presto!
The only things I had to change were static variables, which had to be moved to stack space. Threading code can't tolerate global/static data, because race conditions immediately appeared when more than one thread worked on them.

Once I began using OpenMP, the
renderer crashed many C++ compilers.
As of 2009, they have finally adapted!
Only two compilers truly supported OpenMP at the time: Intel's compiler (version 8.1) and Microsoft's CL. GCC unfortunately died with 'internal compiler error'. I reported this to the GCC forums, found out that I was not the only one who had noticed, and was told (by the forum guys) to wait.
While waiting for GCC to catch up, I kept researching multicore technologies. Functional languages seem particularly adept to SMP, and I've put them next in line in my R&D agenda (Ocaml and F# in particular). Before leaving C++ behind, though, I heard about Intel Threading Building Blocks (TBB) and decided to put them to the test. TBB is a portable set of C++ templates that makes writing threading code a lot easier than legacy APIs (CreateThread, _beginthread, pthread_create, etc). TBB is also open-source, so it was easy to work with it and figure out its internals. Truth be told, it also required more changes in my code (OpenMP required almost none). Still, it is a vast improvement compared to conventional threading APIs.
I must also confess that I have not invested a lot of effort in using these technologies; I only enhanced two of my main rendering loops to make them SMP aware. Still, this was enough to boost the speed (on a Core2Duo) by 80%! Judging by the gain/effort ratio, this is one of the best bargains I've ever found...
As of now (October 2008), GCC 4.3.2 is up to speed and compiles OpenMP code just fine. TBB is of course running perfectly (since it is simply a C++ template library), so choose freely between any of the two, and easily achieve portable multithreading.
When I say portable, I mean it: these are the tests I did...
- OpenMP binaries (./configure --enable-openmp --disable-tbb) for...
- Windows (via TDM/MinGW GCC 4.3.2)
- Linux (via GCC >= 4.3.2 in both 32 and 64bit)
- Linux (via Intel's compiler in 32 bit)
- FreeBSD 8.0 (via latest GCC version, installed through ports, in 64bit)
- Mac OS/X (follow these instructions to get a GCC that supports important SSE optimizations (-mrecip) and has stable support for OpenMP - Xcode's GCC 4.2.x is too old for OpenMP).
- TBB binaries (./configure --disable-openmp --enable-tbb) for...
- Linux (via GCC in both 32 and 64bit)
- Linux (via Intel's compiler in 32 bit)
- Mac OS/X (even with Xcode's old GCC 4.2.x)
- FreeBSD 8.0/64bit
- OpenSolaris (tested with 2008.11 / GCC 3.4.3)
- Single-threaded binaries for...
- Poor OpenBSD4.3/64: it doesn't have real, SMP threads. Not yet, at least :‑) It only has user-space ones (as Linux did at some point). But it does compile the code, albeit in single-threaded mode.
Talk about portable code!
Dynamic scheduling makes sure all cores
are kept busy, even for low tesselations
If you're still in the... dark ages and use legacy APIs (CreateThread, _beginthread, pthread_create, etc) you are really missing out: Under both OpenMP and Intel TBB, I increased the rendering frame rate of the train object by more than 40%, by simply replacing...
#pragma omp parallel forwith
#pragma omp parallel for schedule(dynamic,100)(similar change for TBB, at code inside Scene.cc).
Why? Because these modern threading APIs allow us to easily adapt to different loads per thread, by using dynamic thread scheduling.


| Index | CV | Updated: Wed Nov 22 21:28:46 2023 |